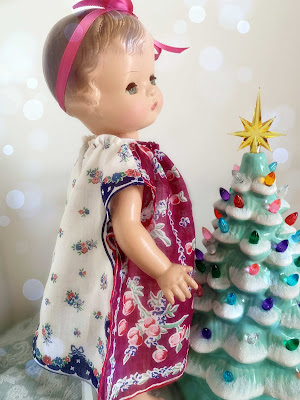
For my recent Patsy doll restoration,
I made this little hanky dress.
I promised I'd do a tutorial.
HERE IT IS!
I wanted to make three sizes, so I chose
for my models, Patsy Joan (Charlotte) who is 17",
Patsy (Daisy) who is 13" and
Patsyette (Helena) who is 9".
I have a box of old hankys that I have kept, thinking
I would make them into something.
You may have noticed Helena
already has a hanky dress.
This was done using a pattern.
For today's tutorial we won't use a pattern.
I found out all my hankys are different sizes.
The largest I had was 15".
The other two sizes are 12" and 10".
The 15" hanky will be the front of Patsy Joan's dress.
Larger dolls will need 2 hankys, or a hanky and
coordinating fabric for the back.
This hanky has a tear, so it is a perfect candidate.
For our tutorial today I will be using
Helena as my primary model.
I chose a smaller 10" hanky for Helena.
Folded in half the hanky should
reach your doll's knees.
Cut a slit up the center in back.
At the top cut out to within an
inch and a half of the edge to create
the sleeve. This will be our neckline.
For a larger dolls increase the inches
for the sleeve.
Your Hanky should look like this.
From the left back start sewing a
small shirt-tail hem all around the neckline.
Sew all around the neckline you have cut.
This thin point, I will reinforce
with fray check.
You should end up with this.
Next I set my machine on a long stitch and sew
around the neckline AGAIN for gathering.
Be sure this stitch is not too deep.
I used the inside edge of my presser
foot for a good stitch depth.
Gather by pulling one thread and slowly scrunching
fabric into gathers all around the neckline.
When the collar is gathered you should
have something like this.
At this point the back is open.
I laid Helena next to her dress
The back will be closed to the
height of her hip.
I did another shirt-tail hem about 2/3rds
down on each side. Then I closed
the back from the bottom hem up.
I started out closing the side seam like this,
BUT, I didn't like it, so I tore it out
and did a normal side seam.
These 1930s doll dresses were closed with a
little safety pin. I am dong the same
with these hanky dresses.
Back to Charlotte's dress. Since this dress needs 2
hankys I did it a little different.
I chose a coordinating hanky for Charlotte's dress.
Both hankys were trimmed to the right length and
hemmed along the top. I used a small zig-zag
stitch to join the 2 hankys at the shoulder.
The rest of this dress was done just the same.
NOTE: I was making this up as I went along.
If I did this again, I would hem the 2 hankys
together normally and then do the shirt-tail hem
around the neckline.
Here are the finished dresses
Helena
Daisy
AND....
Charlotte.
Merry Christmas Everyone!!


8 comments:
These are so cute!
Hi Mary, Thank you!
Hugs
Brenda
Hi Brenda,
thank you for the tutorial. I can't wait to try making some dresses. They all look so pretty.
I hope you and your family
have a lovely Christmas.
Anna
Hi Anna,
Thank you! You are SO welcome! I like simple projects like these. I know a lot of my friends have a stash of old hankys just waiting to use them for something.
Merry Christmas to you as well.
Hugs
Brenda
Your hanky dresses are so sweet - I love that you combined two for a custom look, I iove the simplicity of Helena''s soft plaid.
I've been working on 15" Revlon clothes- but all by hand until my machine gets fiixed .
Janet
Hi Janet,
Thank you! I was pleased with how these turned out. I wasn't sure about Charlotte's dress with 2 different hankys, but I think it worked.
Hugs
Brenda
Thank you for the tutorial!-Gaela
Hello Gaela,
You are SO welcome!
Hugs
Brenda
Post a Comment