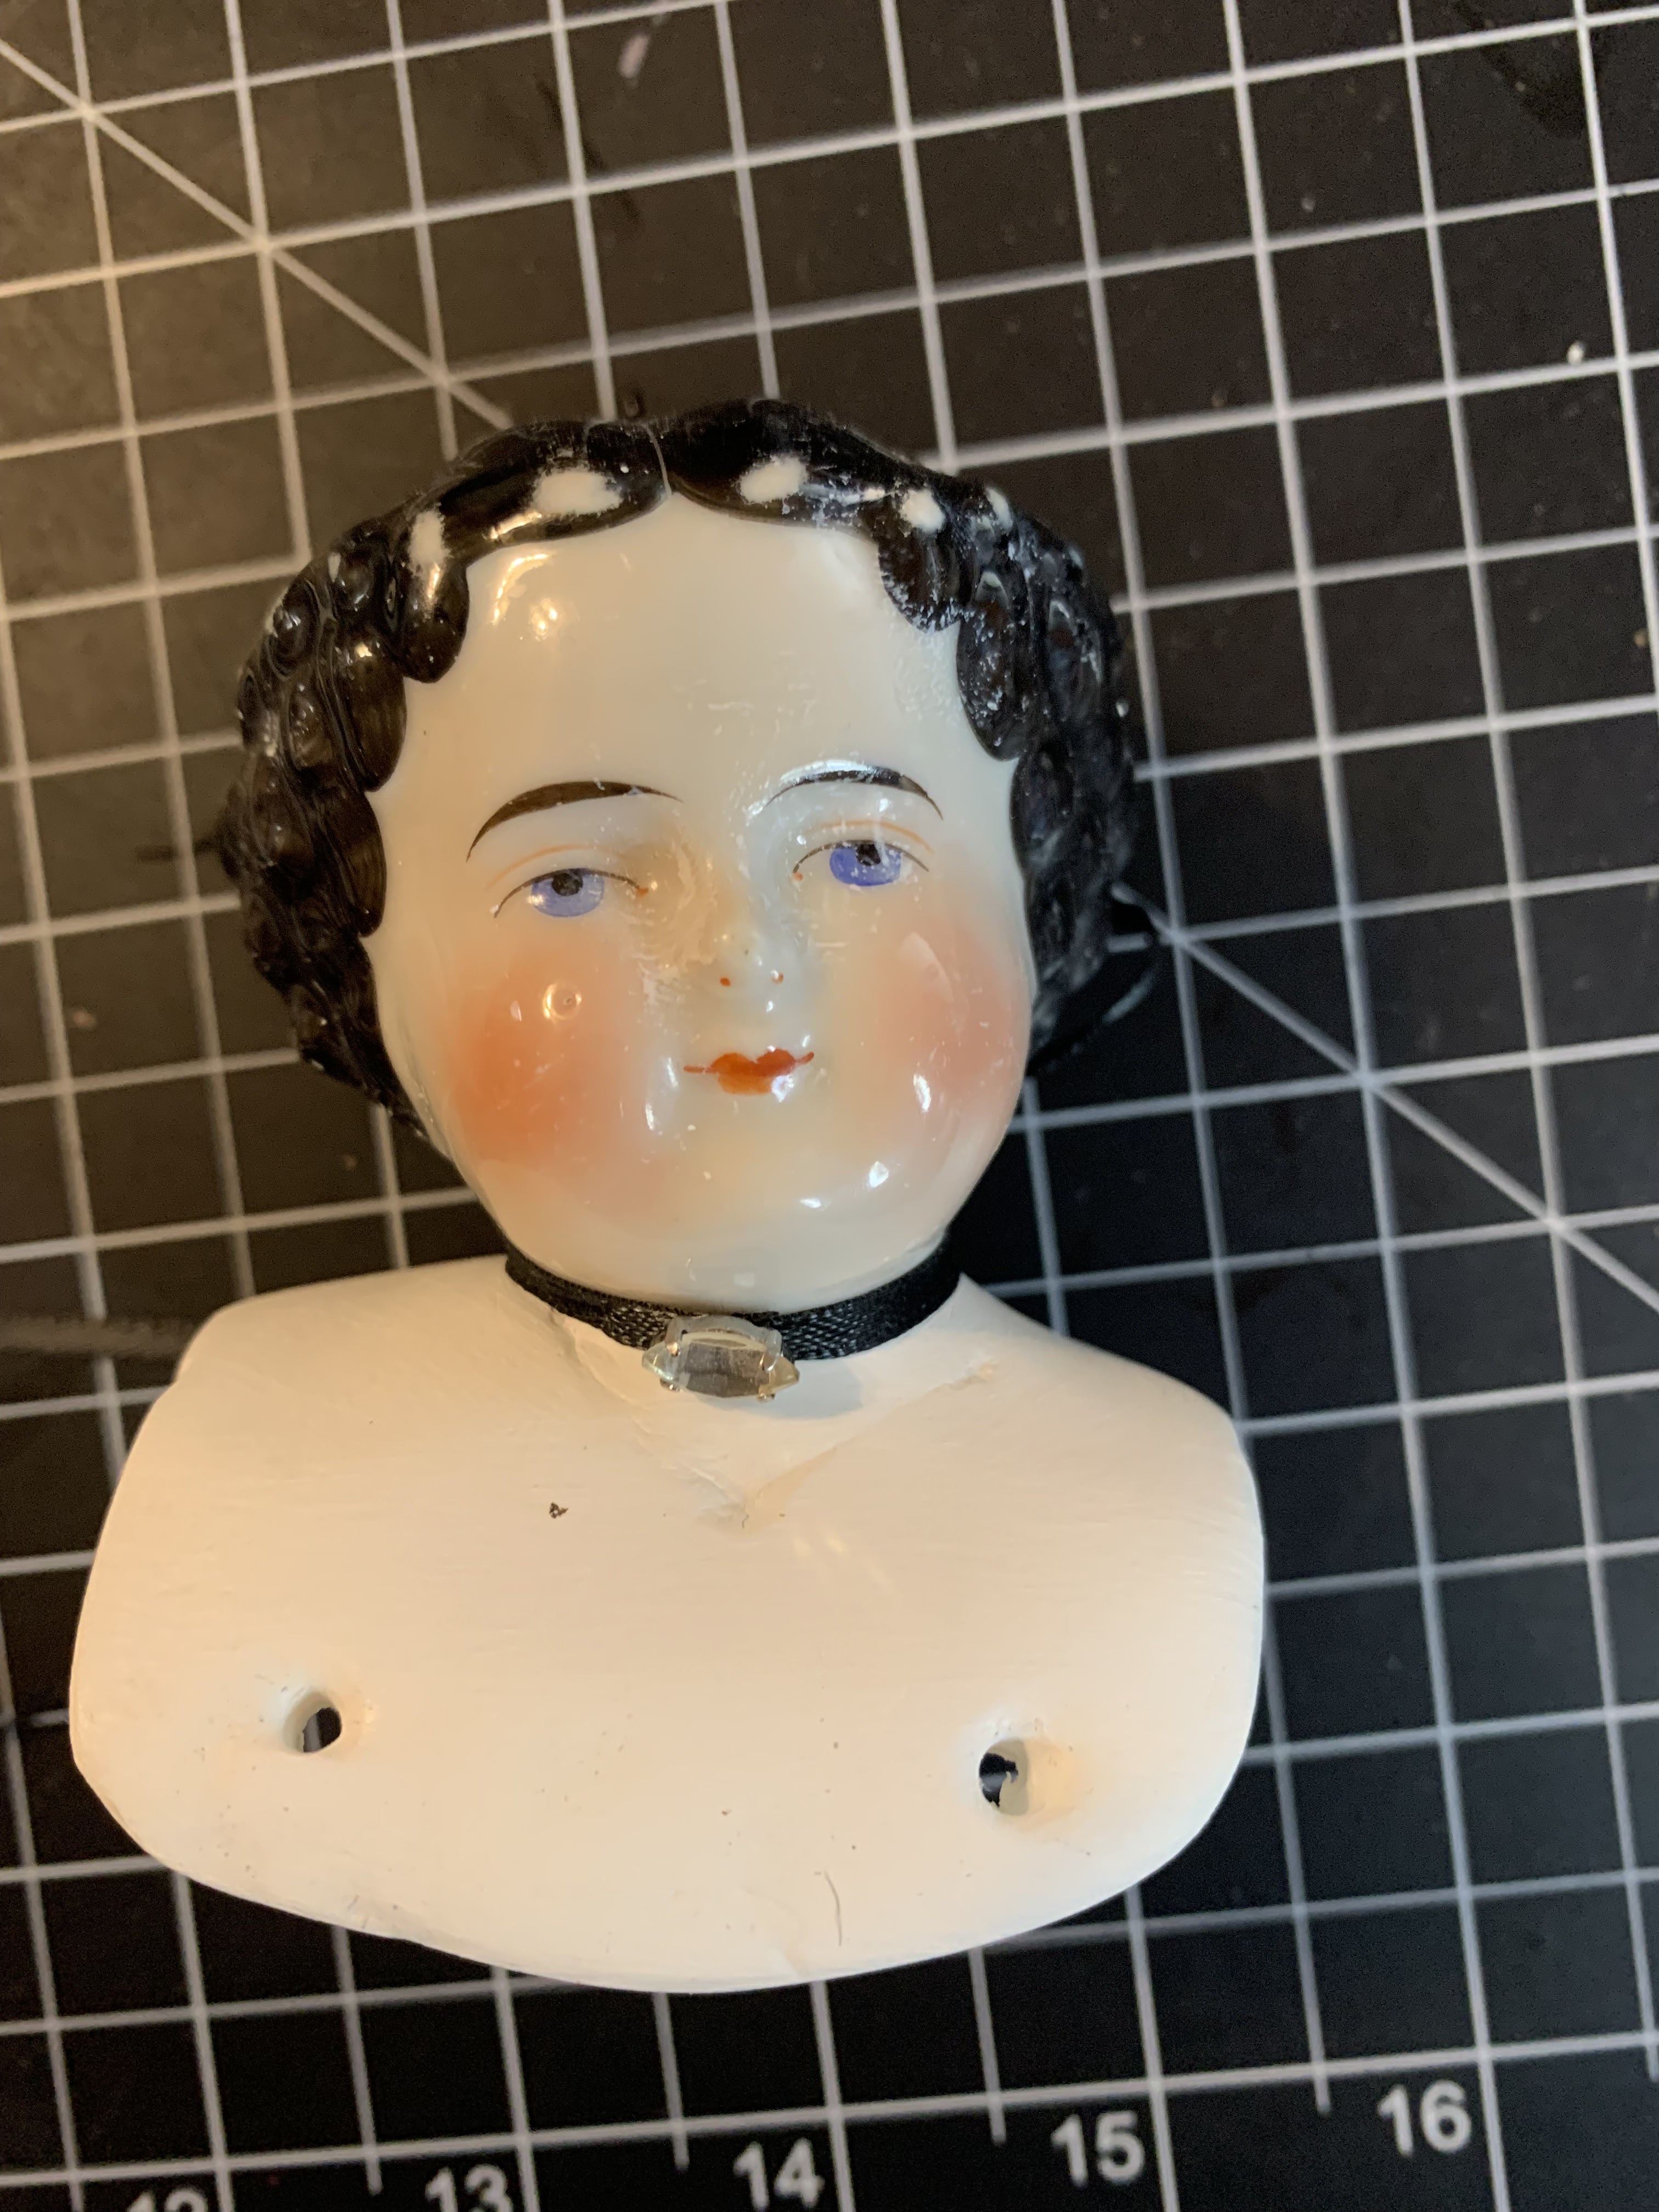
In my last post I restored this China Head doll.
She is all finished now and I've
decided her name is Clara.

While Clara's makeover was going on. I was
also starting to work on the Horsman baby...

At first I thought the right leg was
missing, but we found it in pieces lying
underneath baby in the box!

I took baby apart and had a meeting with
my technical advisor; my husband
Matt, the woodworker.

I tried wood putty to reattach the leg parts,
but this failed miserably. Matt suggested
some industrial strength epoxy.
This worked!

After the epoxy dried, we used a cardboard
paper roll and rubber bands to create
a rounded base to rebuild
the missing leg section.
This was also epoxied.

After everything dried Matt was able to
sand away the rubber band.

We covered everything with a thick layer
of wood putty and set it to dry.

After some building up and sanding the
leg is looking pretty good!

I have been working on baby's face paint.
There were only minor cracks on baby's face.
I'm not 100% satisfied, so I will keep
working on her face.

Baby's body was in bad shape, so I traced a pattern
and made a new body.

New body sewn from linen fabric.

I still have some work to do on baby's legs.
I can see the left leg is slightly shorter
after we rebuilt it, but
I will just adjust it in the cloth body.
But now what about all
those doll clothes?


After a soaking wash and being laid flat to dry,
I ironed all the pieces.
Here are my two favorites!

This little sailor dress.
AND
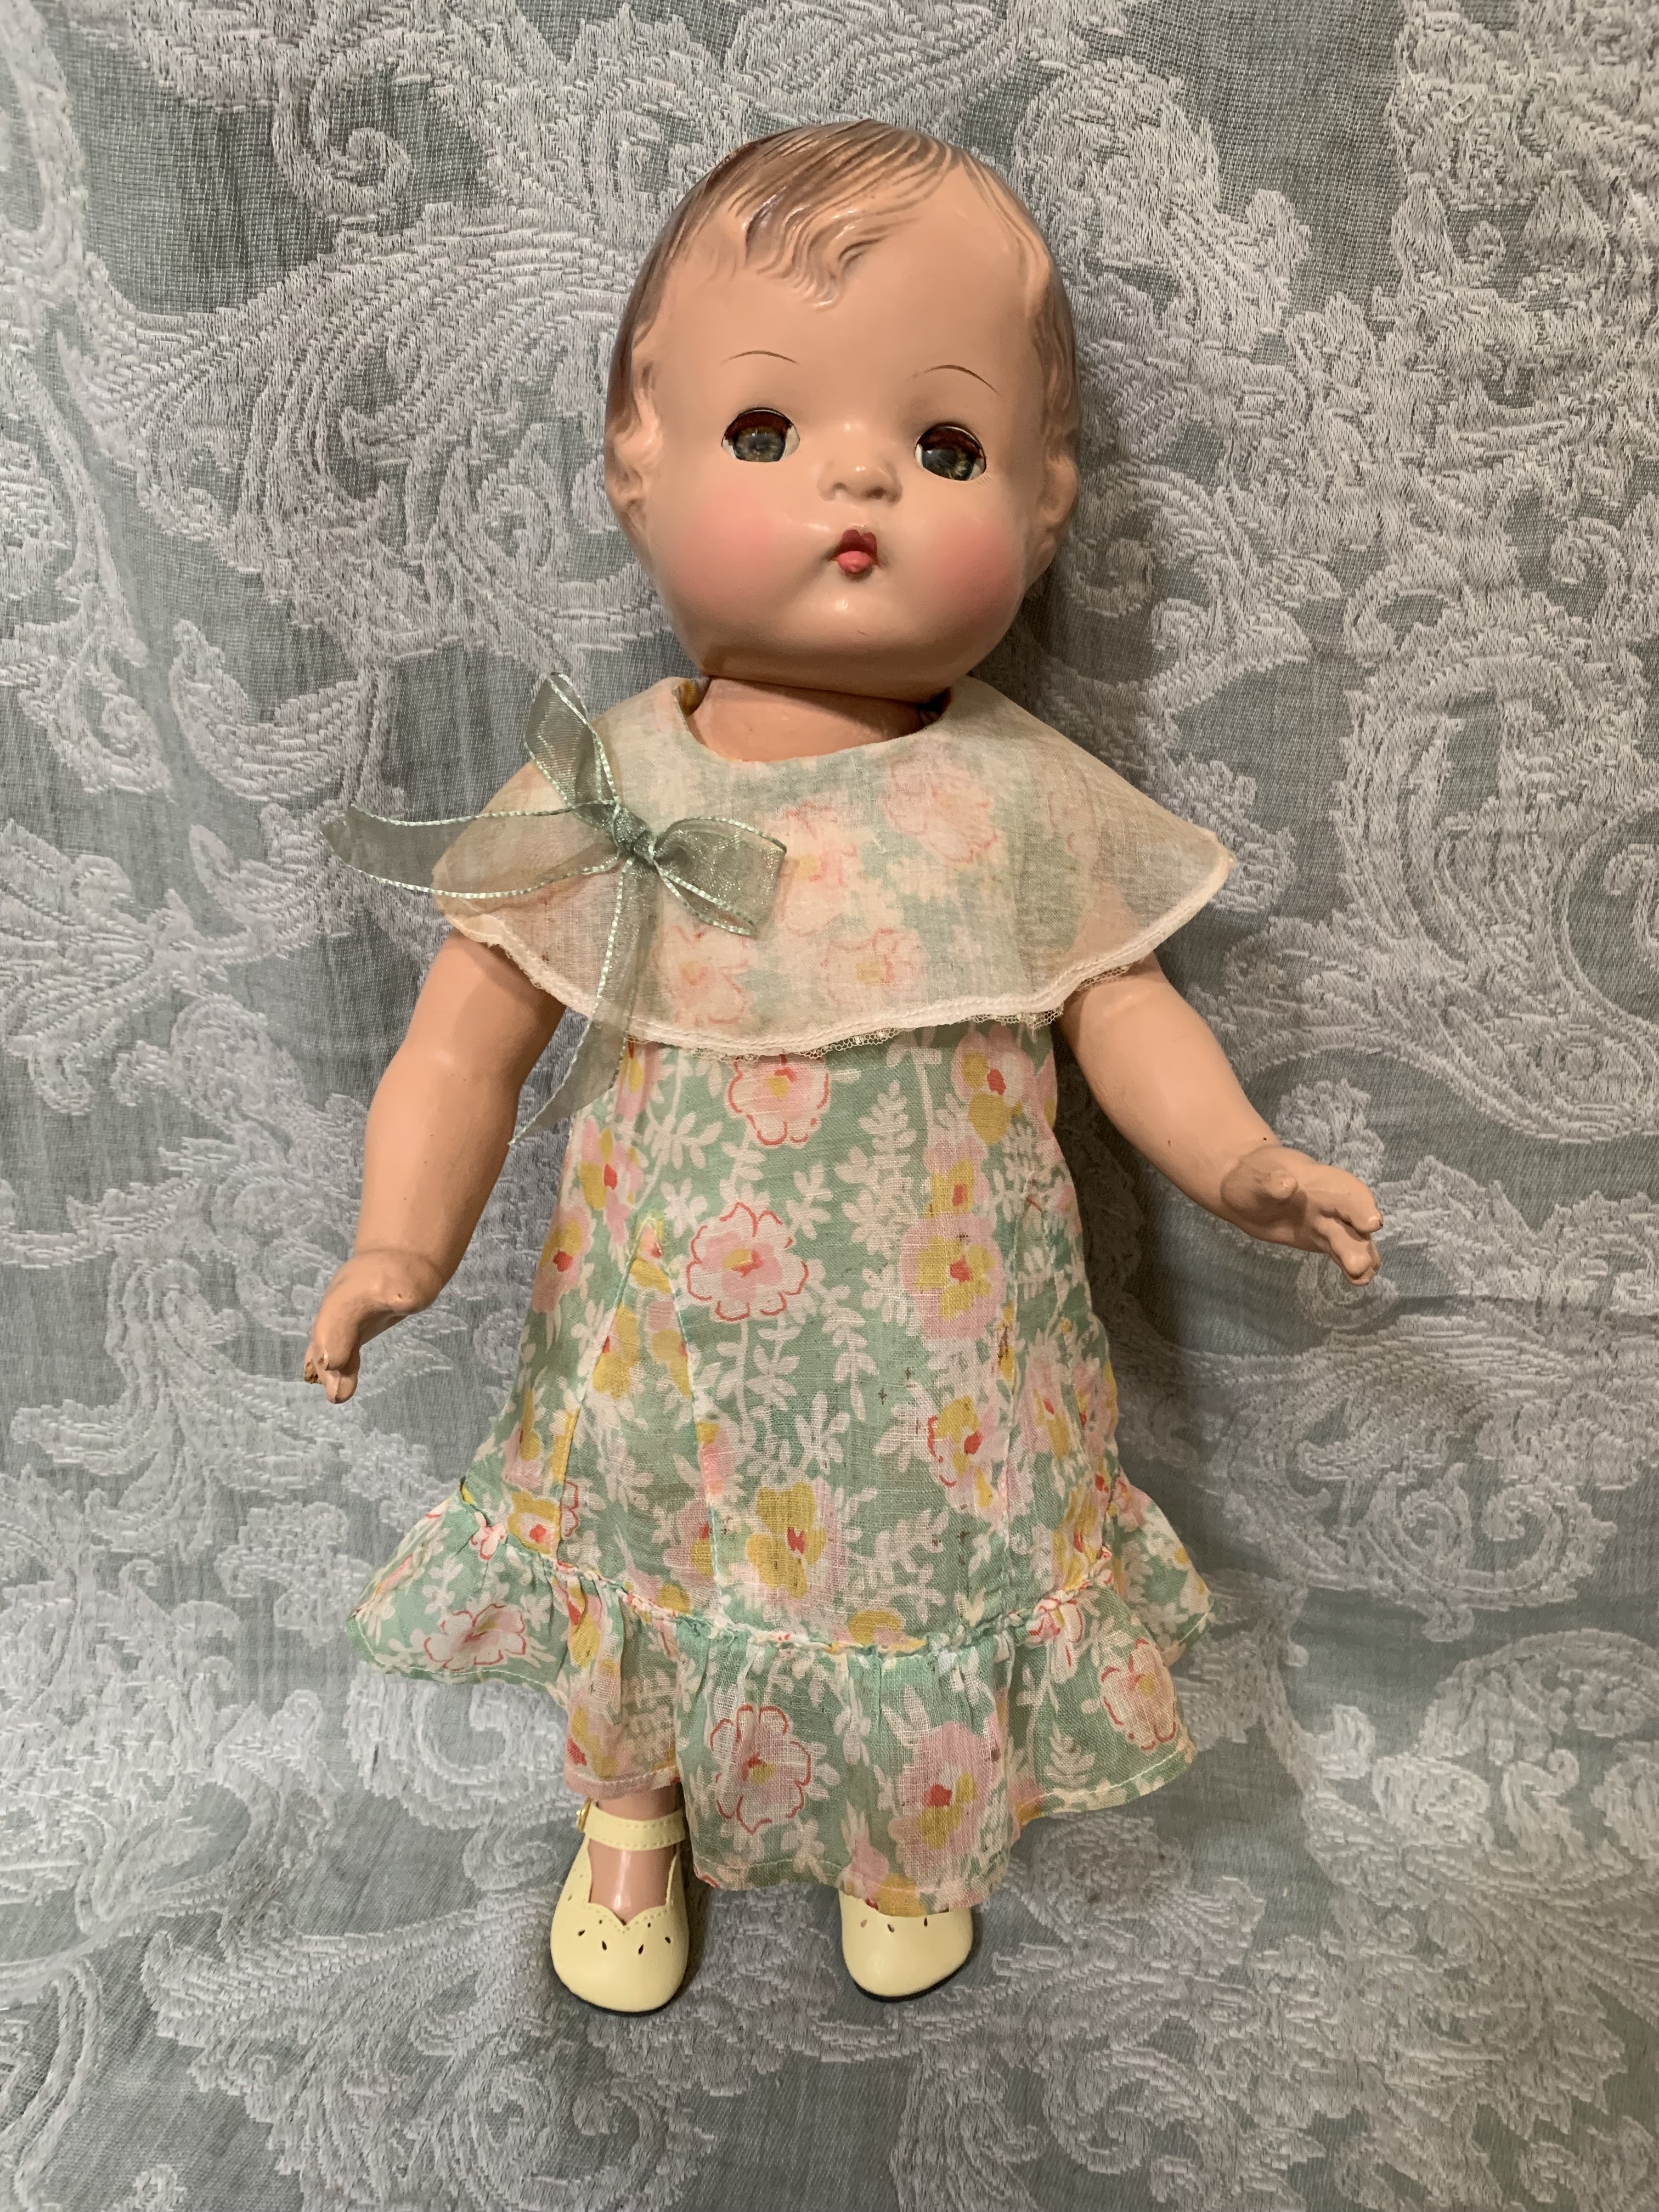
This vintage floral dress.
Back to Baby!

Limbs have been painted, and baby is ready for reassembling!

The cloth body must be turned inside out.
Then the limbs are inserted and wired.

This is the rebuilt leg. All that's left is
refilling the cloth body with
stuffing.

HERE
SHE
IS!

It's cold outside!

Very sweet!

She's ready for Christmas!