My Dolls Click image to go to post

My Dolls Click image to go to post
WE LOVE COMMENTS!! Comment as Anonymous, just sign your name!!! Email me at: thesavagedollblog@gmail.com

Saturday, July 20, 2019

Cabinet Doll House - Part 3

When last I worked on the dollhouse the upper
floor was pretty close to complete.
Since then I have been working on some crafts to 
add some more decor items to the house.

I crocheted two floor rugs.  

I gathered up some miscellaneous mini frames.

I made some paper crafts.
Mini-book tutorial to follow soon!

AND I decided to use these tiny LED strings for lighting.
So how is it all coming together?

TAKE A LOOK!

Here is a view of the whole interior.

The upper bedroom got a new blue rug.

And a pitcher and bowl.
The tiny Raggedy Ann book is from an
online seller. This  little book has all the
illustrations and stories inside!

Here is Maggie's bed and a book of poems.

Here is Lillie's bed.

NEXT THE PARLOR!

Here is the parlor with a new pink rug.

This shelf was part of the window frame.
I took it apart to use both pieces separately.

A view of the corner table.
The butterflies are fabric cutouts
glued to thin cardboard.

This little table was a plain wood drawer box from Michael's.
My husband helped me add the trim around the top.
Then I painted it to match the other green pieces.

The window frame was once attached to the shelf.

One of the books I made sitting on 
a rattan love seat. I painted the rattan 
pieces white and made the cushions.

And that's everything!
(for now)

Thanks for checking in!

LOOK!
A couple cute additions!

This little tea set just arrived!
The scale is a little large, but I like it.

 The girls like it too!

Since their house is in a Cooley Record Cabinet
I thought they should have a record 
player and some records.

Thursday, July 18, 2019

Restoring Oilcloth Doll Shoes


My recent doll acquisition, a 9" Patsyette,
came with her original oilcloth shoes.
These shoes are literally made from cloth 
that was oiled, most probably with an oil paint.

Here they are.
I always ask myself before I try restoring
Dolls, doll clothes, or in this case,
doll shoes,  "can I make it any worse?"
The answer in this case is a "no".
These shoes are tattered and unattractive.
I am sure many collectors would tell me not to do this!
"You'll ruin their value!"
They may be right, but I don't think any
self respecting doll would want to wear such sad slippers.

I also ask myself , "If I do nothing would the item 
in question continue to deteriorate?"
YES, I think they would.
SO, here we go!
You can see here how the fabric has torn
 from around the snap closure.

I cut a small piece of muslin and using
TACKY glue I glued the fabric to the inside
of the shoe for reinforcement. 

Next I mixed some acrylic paint in what I 
call an antique pink and brushed it all over the outside of the shoes.
I was careful to avoid getting paint on the buckles.

After the paint was dry I used tiny scissors
and trimmed off  the ragged edges of the shoes.

And here they are!
The little bows are now lying flat.
The edges no longer look tattered.

I think this is a huge improvement!
The paint strengthens the fabric and stops the fraying.

Before and After.

Such lovely results.
Elizabeth is so pleased!


Tuesday, July 16, 2019

9" Effanbee Patsyette Doll


I recently found this little girl on eBay.
She needed some TLC.
Her left eye is chipped.

And her neck needs some work.
Her Effanbee stamp is quite clear.

Her right leg was poorly painted, but,
overall her paint was in good condition.
So, I decided to try and just fix the problem areas.

I used a wood filler to cover the broken area on the back of her head.

Next I wanted to repaint her eye.
I mixed brown and green to match her eye color.
I painted a circle of green, then let that dry.
Next I painted the black pupil.
To finish I dabbed a tiny dot of white.

Not bad for my first try!

Using make-up sponges I touched up
the back of her head and hair.

Then I gave her a little more color
in her cheeks.

I already had this little dress.
It fits perfectly!

Here she is next to her sister.
She is slightly larger.

Her little sister kindly let her have 
the bigger of the 2 beds.

Here she is sitting pretty with her little Raggedy Ann.

WAIT!  Their names!
I had a suggestion of Elizabeth and Margaret,
after the Royal Princesses.
I like these names, so they will be
Elizabeth on the left and Margaret on the right.

Next I want to see if I can improve her little shoes.

Friday, July 12, 2019

Cabinet Dollhouse - Part 2

In my previous post the Cabinet Dollhouse bedroom looked like this.
I decided to put the small Bisque Dolls in another place.
I thought the 2 sizes of furniture didn't work well.

The Bisque dolls are now in my Grandmas Secretary.

I also had this upper wall situation to solve.

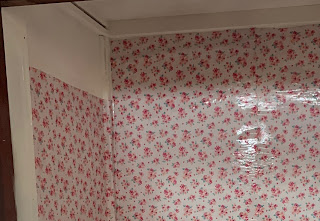
This is my solution. I painted the upper wall pink and added
some mini-molding in white.

Here is the full wall.  I may do something more in the corner.
But, what is that extra bed post you see?

Over the weekend I found this little bed in my 
local Antique shop!

Yes, it's a Strombecker doll bed.
These were made for the little 8 - 9" dolls
like Ginny and Muffie in the 1950s.

But my new little bed needed a mattress and a quilt!

I selected some fabrics from my remnants bin.

I did a simple zig-zag quilt to match the other bed's quilt.

Here is the new bed all made up!
BUT! Who is going to sleep here?

This little 9.5" Patsyette doll from the 1930s!
She needs a little TLC. I can't wait for her to arrive!
She is coming from Texas, so she should be here soon.

So here is the top floor of the Cabinet Dollhouse thus far!

Now that there is another Patsyette coming
both these little dolls need a name!
Hhmm....any suggestions?