

This is Sophie's case room. I made it for her
a couple years ago. It is the
perfect size for her.

But now, with Melanie AND Sophie,
it is too crowded!!

This will be the girls NEW case room.

As you can see, it is much roomier.
BUT it needs furnishing.
SLIPPER CHAIR TUTORIAL!

I will start by making two new slipper chairs.
I like to use thin cardboard.
An empty kleenex box is perfect.

I cut a circle approximately 2 3/4" in diameter.
Using a cereal bowl I make a half circle 6" long and
about 2" high.

Then I cut a piece 4" by 1".

Using my cardboard I trace the shape on my fabric.
Fold the fabric over and sew along the shape.
This will upholster the back and front of
the seat.

Turn your fabric right side out. Hotglue some batting
to the colored side of the cardboard cutout. Then cover the
seat back with the fabric and hotglue to the bottom of
the seat back.

Next hotglue some batting to your seat and
hotglue four sides of your fabric to the seat.

Then pull all four corners tight and
glue them down as well.
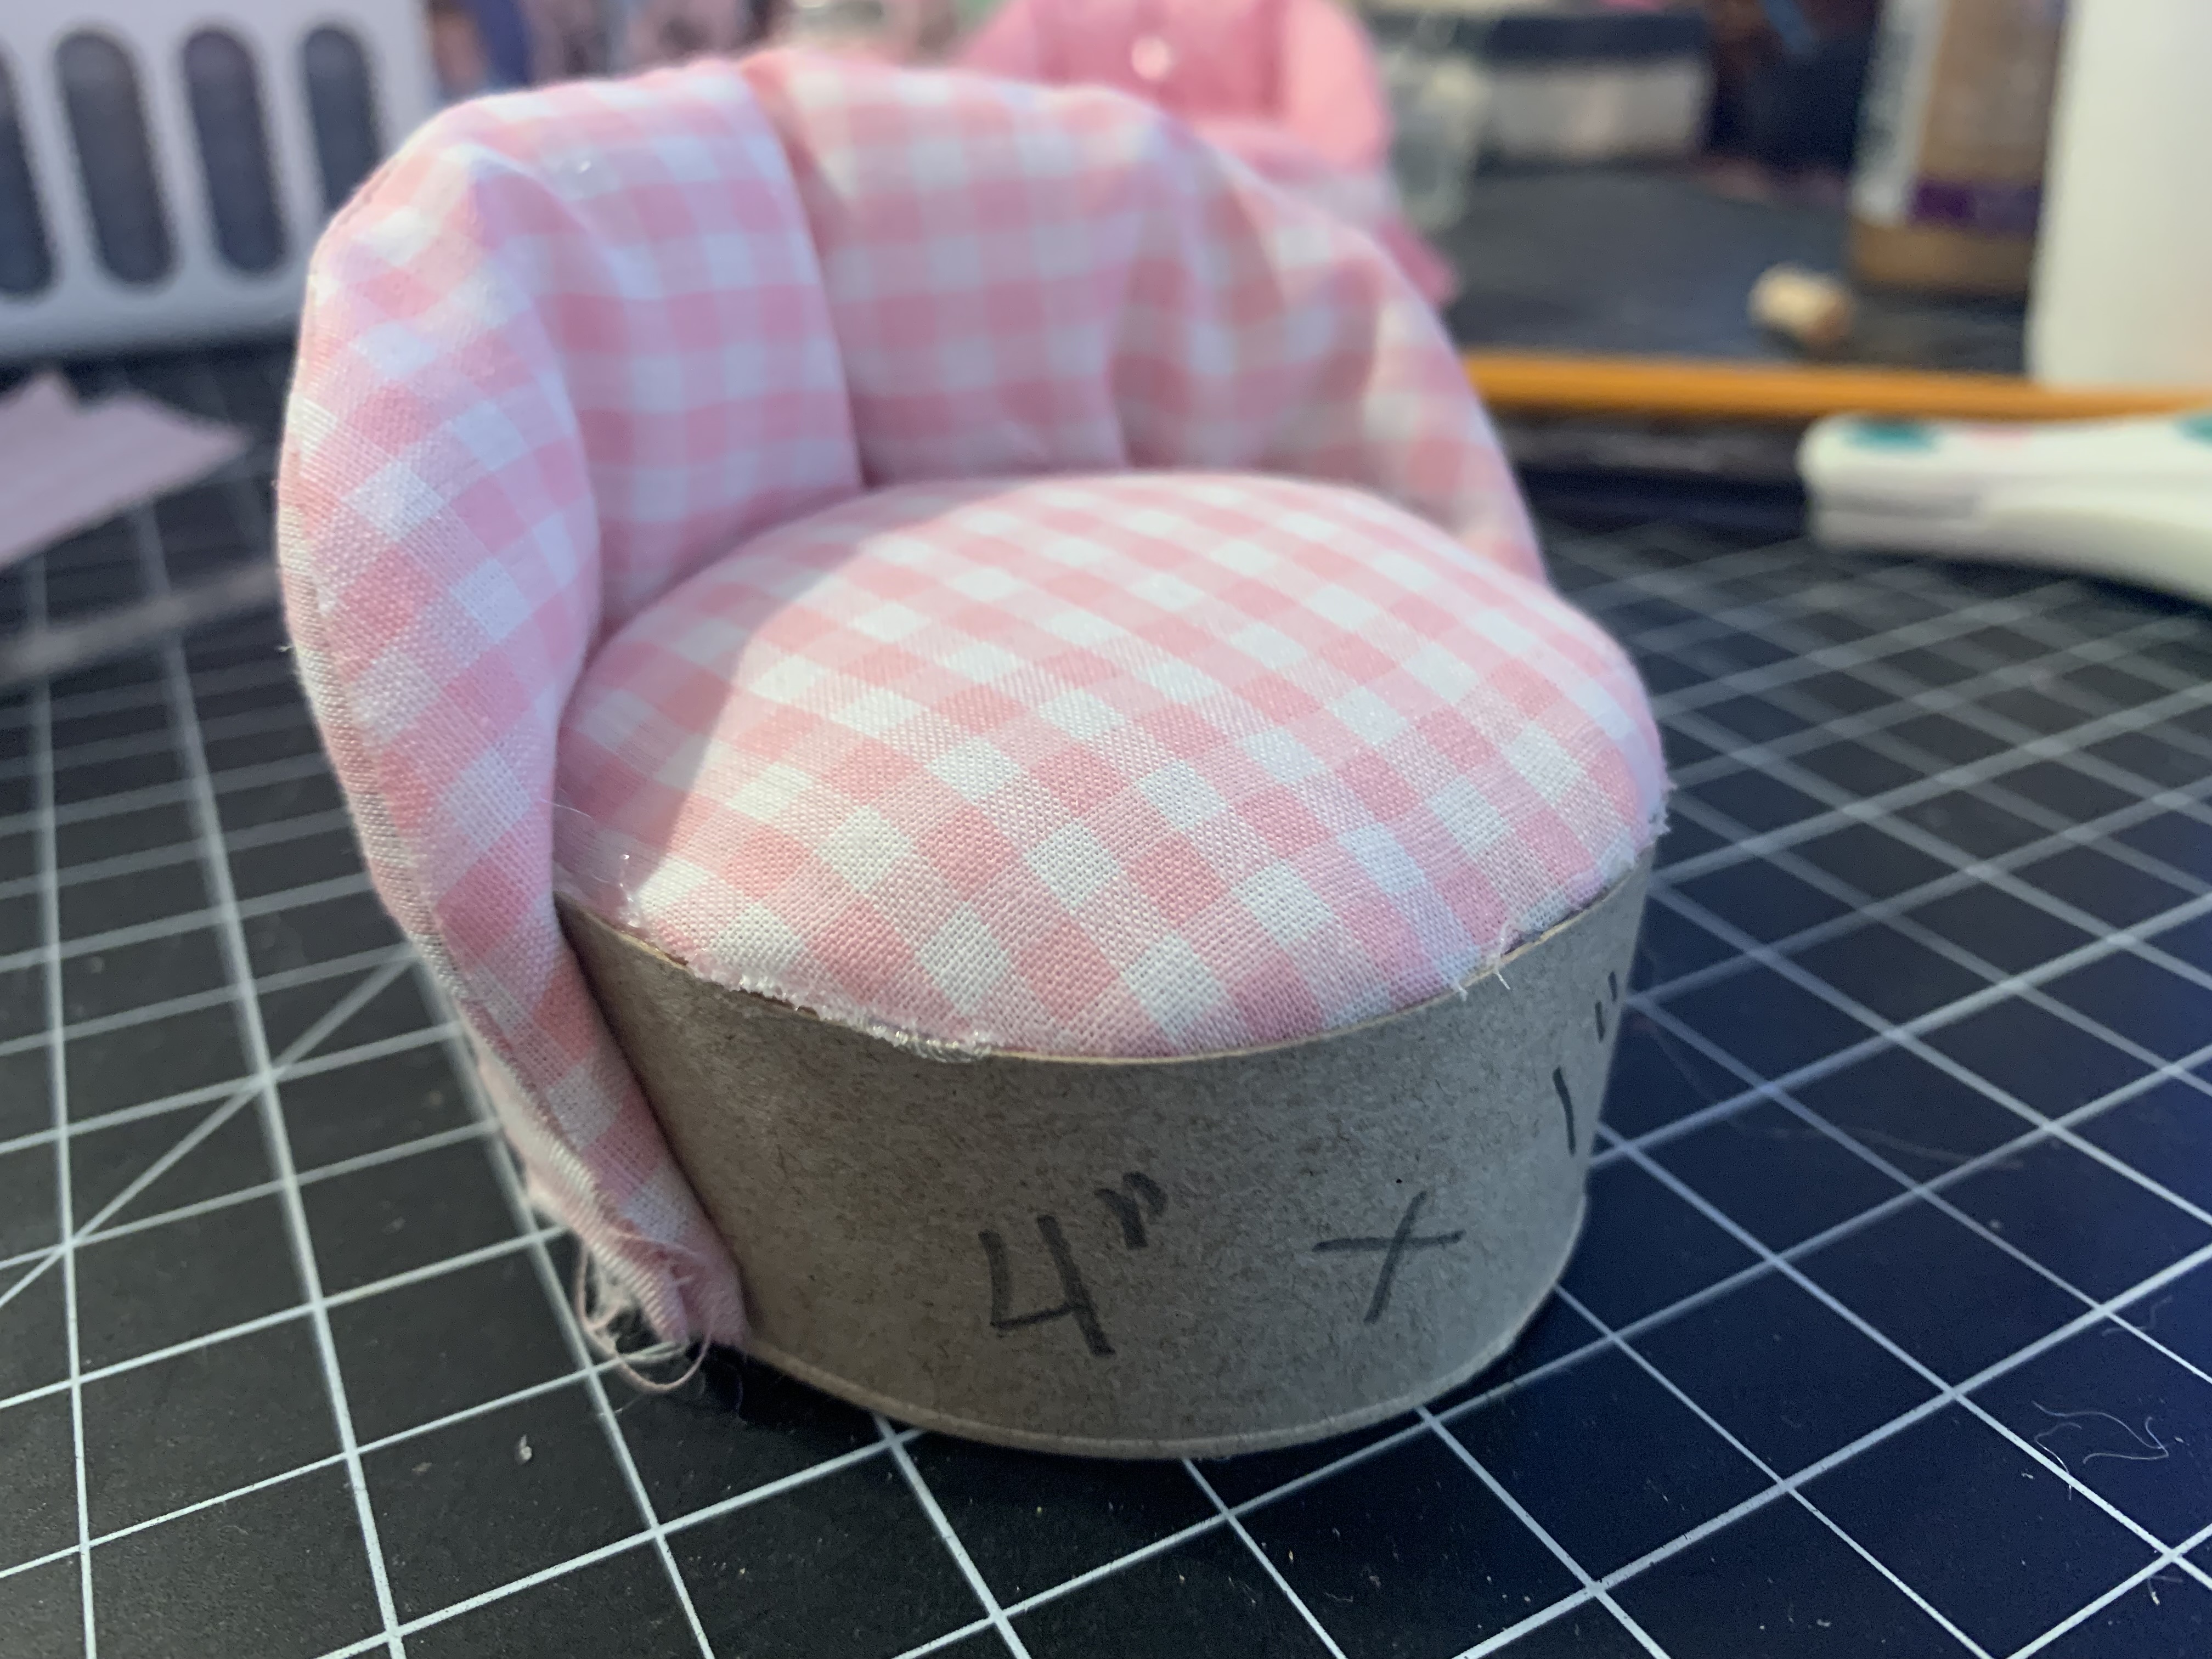
Now your 3 pieces are ready to assemble. Hotglue
the 4" strip of cardboard to the seatback and
add the seat on top.

The chair will be approximately 9" around. I cut out a strip
of fabric 18" long by 1 1/2". This is hemmed and gathered.

Starting in the middle of the back hotglue this gathered
fabric around the base of your chair.

Finish the chair with ric-rac or ribbon all around the gathers.
Then I like to add a bow in back.

I made two chairs so each girl has a place to sit.
This next part I got help from my husband.
A similar bunkbed could be made with popsicle sticks.

My DH is helping me make bunk beds.
We cut out this shape for the two ends.

Then we had two 8 1/2" rectangles for the bunks.

All glued together!

And some pink paint.

I hotglued some gathered lace around the
beds to act like a skirt.

I used thin cotton batting doubled and covered
with fabric for the mattressess. Then I
added some pillows and a thin fabric
for a blanket.

This is what I have so far.
This will not be the floor!
This is just sitting on my ironing board.

The two little dressers I found
at the dollar store. They will
be painted as well.

As you can see, there is plenty of
room for both Sophie and Melanie.
I will continue working on this case
and share the finished room in my
next post!
6 comments:
Hi Brenda,
The room is looking really good so far. I love the bunk beds and chairs.
Your girls must be so excited.
Anna
Hi Brenda,
Your creativity is flowing along. Love all the colors you are using. Thanks for showing how you made the darling slipper chairs. I have been wanting to make this style for my Barbie doll area but was nervous to start. You have given such great instructions I am ready to take the plunge.
Cant wait to see their finished new digs.
Doreen in Arkansas
Hi Anna,
Thank you! I am pleased with everything so far, just trying to figure if I will add some wallpaper or not? It's a lot of blue in the background. The girls are VERY excited and can't wait to each have their own bunkbed.
Hugs
Brenda
Hi Doreen,
Thank you! I'm so glad I could inspire you! Be sure to make your slipper chairs for barbie bigger in circumfrence and taller! Barbie has such long legs. These slipper chairs are SO simple, really just 3 pieces. YOu can make them without sewing, just hotglue everything.
Hugs
Brenda
The room looks beautiful and very cozy. I admire your talents, Brendo. Best regards.
HI Zacisze,
Thank you! I enjoy making cute doll rooms. I am so glad you like what I have done so far.
Hugs
Brenda
Post a Comment