These doll jeans have been cut out and
sitting on my sewing table for quite awhile.
As you can see this pattern is for an 18" doll.
I wanted to do a step by step for
those who find pants confusing.
(If I can make them anyone can!)
First thing is to put the pieces face to face
and sew the side seam.
Next I always iron out my seams flat.
At this point I hem the leg.
Repeat with the other pant leg.
Guess what I did here?
Yes, I sewed the fronts together
and backs together.
ARGH!!
I am not too worried because
this pattern is for an American Girl
size doll and this gives me some
extra fabric to play with.
I trimmed away the excess and charged ahead.
(Yes, I know, charging ahead was my
original problem)
I sew the 2 pant pieces together and only edge
the open back seam.
Now I am ready to fold the pants face to face
and sew the inseam.
I sew from one side to the other.
The back is left open.
First fitting!
Yes, these are for
Miss Revlon, Marylou.
You can see how BIG these jeans are!
With a pin in back to create a natural closure,
I pinch a tiny bit of fabric and pin it.
Darts pinned in front...
And darts pinned in back.
I keep adjusting the darts til
the waist looks nicely fitted.
I sew the darts in a steep angle from
waist to fabric edge, about 1 1/2".
I have sewn all the darts I pinned.
This creates a nice slim waistline.
now I am ready to finish the waist.
I make a tiny double fold and sew.
My Grandma called this a shirt-tail hem.
ALL DONE!!
So now I want to showcase these
jean slacks.
Here is Marylou in a more formal jean
outfit. The pillbox hat has removable
pins to create different looks.
A lacy blouse and a blingy belt
are finished wth a draped sweater
and pillbox hat.
Here are the same jeans with a casual
plaid camp shirt.
The blue shoes Marylou is wearing
had these yellow pom-poms.
WELL! I pulled the poms off.
I will save them, but honestly
I have had them for over a year
and NEVER found an outfit they
worked with.
Towards evening at the beach you
need a sweater as the temps drop.
I called these shared pants
because they will fit Cissy too,
but Cissy needs a casual shirt.
I plan on remaking this oversize cotton top.
I brought the blouse in along the sides
and sleeves.
After I brought in the sides and sleeves,
I added a pleat down the back.
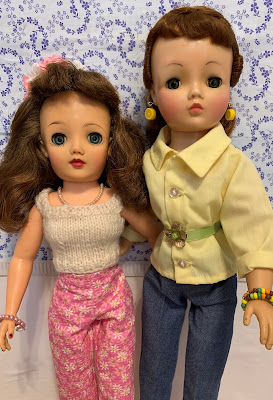
Here is Cissy wearing the shared jeans
plus her newly remade blouse.
As you can see the jeans fit Cissy as capris.
Close-up of the blouse front.
I like the big collar.
Looking pretty and casual.
Marylou and Cissy love to share clothes!
Marylou is wearing a second pair
of casual slacks made from
the same pattern.
After an exhausting day being fitted for clothes,
it's time for a tea break with
little sister Betsy.
AH, tea and cakes, what
could be better?


6 comments:
Both pairs of pants look wonderful! And I love the way you refashioned the yellow blouse!
Thank you Maryn,
I am really pleased that you liked the slacks and blouse. The blouse turned out better than I anticipated.
Hugs
Brenda
Hi Brenda,
I love your outfits. Everything goes together so well.
I don't seem to find lovely vintage dolls clothes very often over here, but I am learning to look at the clothing I do find with the view of can I refit/ re fashion. I never thought to do that until I found your blog and saw all the lovely items you
have re made. Thanks for the inspiration!
Anna
Thank you Anna,
I am really happy that you find my blog helpful. That is one of the reasons I started this blog, to show other doll lovers that re-making and restoring was not that difficult. The yellow blouse was made for an 18" doll with a plumper figure. It made up into a lovely casual blouse for Cissy. I am truly gratified knowing that you enjoy my projects.
HUgs
Brenda
Brenda,
These are great! I have created a jeans pattern for several size dolls,
but mine have working pockets, a waistband, and belt loops. No zipper, but one day I will try that too!
Jenny :-)
WOW Jenny!!
That is impressive. Pockets?!?
I tell myself my jeans are ‘dressy’ hidden pocket jeans. Haha! My jeans just have a snap closure. Sigh.
I’m glad you like what I did though. :)
Hugs
Brenda
Post a Comment